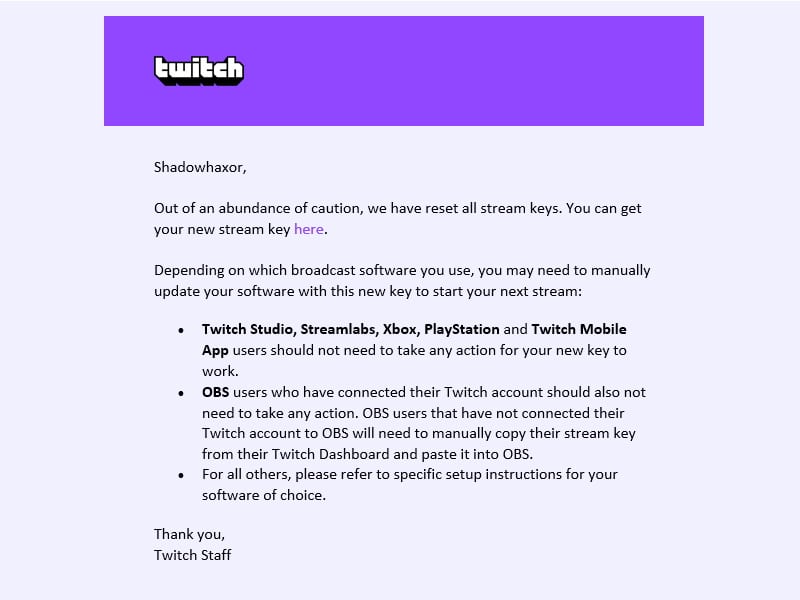
Update: Looks like you don’t have any choice in changing your Twitch Stream Key, as Twitch is forcing a reset for everyone.
As you are most likely aware, Twitch, the live streaming giant, has suffered a massive leak. So far, we have seen various amounts of money that streamers have made while streaming on the platform. And that’s just the tip of the iceberg, so to speak. While Twitch is in damage control mode, we still don’t know just what it was made off with. However, going by what the leakers have stated, everything, including source code, has been snatched, which means that your personal information, including your passwords, has been affected.
This means you NEED to take steps to protect yourself. Even if you aren’t the biggest streamer on Twitch. Even if you haven’t streamed on Twitch in years, you still need to protect yourself; that’s all there is to it.
You need to change three things: your password, enable 2FA, and change your stream key.
How to change your Twitch password.
- Head over Twitch and sign in.
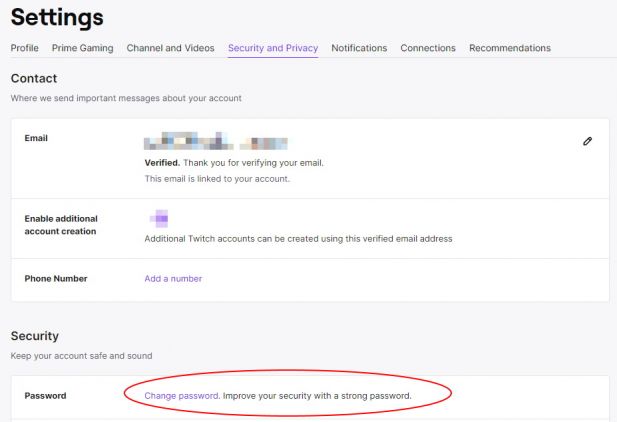
- In the upper-right-hand corner, click on “Settings.”
- In Settings, click on the “Security and Privacy” tab
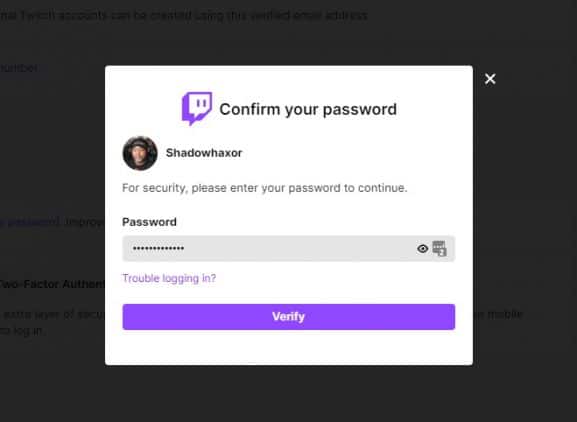
- You’ll be prompted to log in with your existing password again.
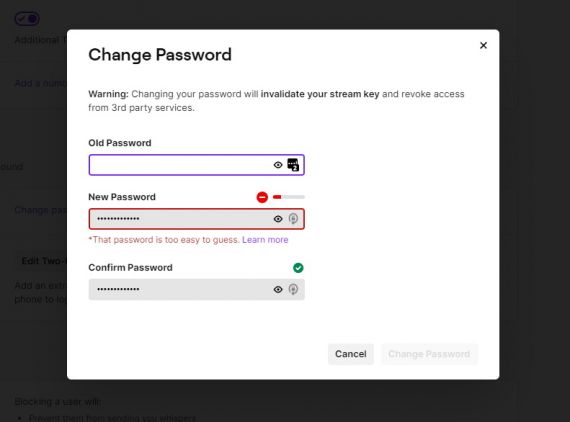
- Finally, you’ll be able to change your existing password. Keep in mind this will require you to also create a new stream key, which we’ll also go over in this guide.
With this done, your password has been changed. Be sure to remember it or put it somewhere safe.
Enable Two-Factor Authentication (2FA).
While Two-Factor Authentication is a pain, it’s also one of the beta ways to ensure that no one can hijack your account. Every time you need to log into Twitch, you’ll have to authenticate against the Twitch app for iOS or Android. Plus if you’re an affiliate or partner, this is required. This way, even if someone had access to your password, they won’t have access to your phone/tablet, would they? So if you don’t have it installed, you should. Especially now.
- Head over Twitch and sign-in.
- In the upper-right hand corner, click on “Settings”
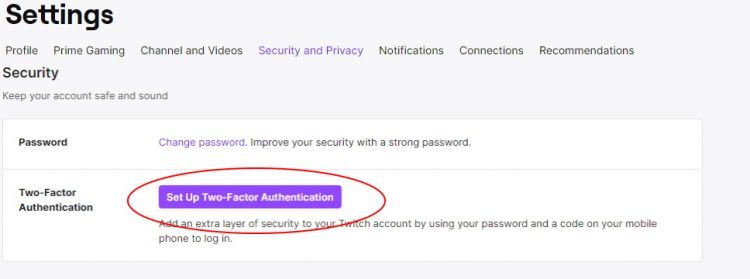
- In Settings, click on the “Security and Privacy” tab.
- Once there, you’ll see an option for Two-Factor Authentication (2FA). Click on that.
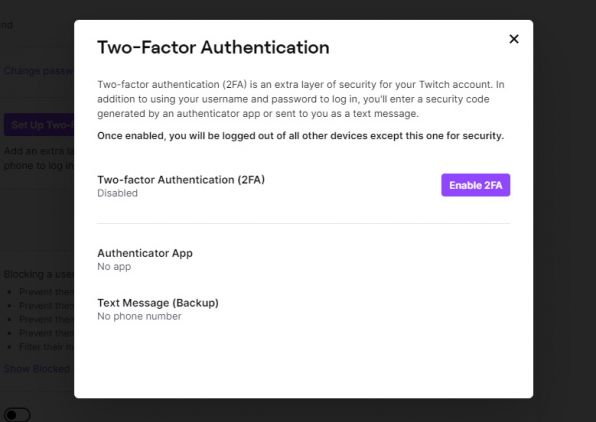
For the sake of this walkthrough, I already had Two-Factor Authentication (2FA) enabled. However, I had to disable it to show you how to do it. For those wondering why I’m telling you how to do it, but I didn’t have it enabled.
- On the Two-Factor Authentication screen, click “Enable 2FA”.
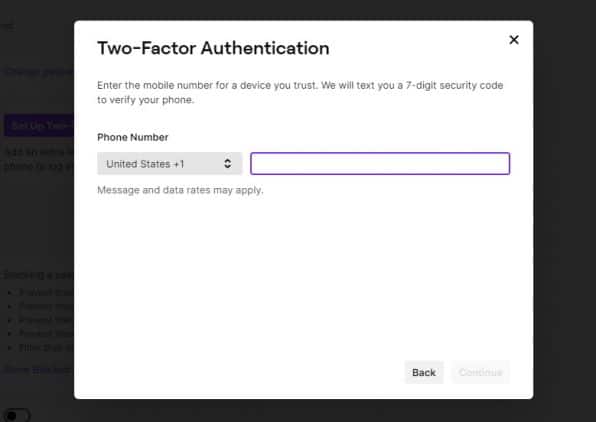
- You’ll be prompted to enter a phone number for your smartphone. This is needed for the app to be installed and the Twitch security token.
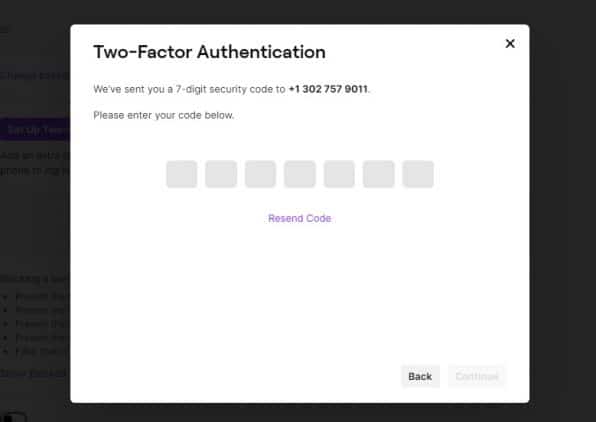
- Once you submit your phone number, you’ll get a code which you’ll need to enter in proceed.
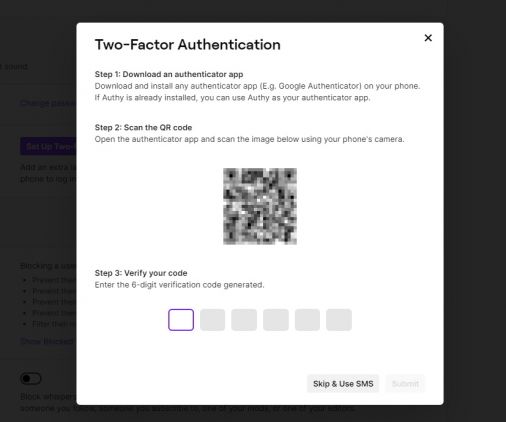
- Now that you verified the code, you’ll be provided with a QR code that will need to be scanned with any QR app on the Apple Store or Google Play. Install one, and then scan the QR code. You’ll be provided with yet another code that you’ll need to enter into Twitch.
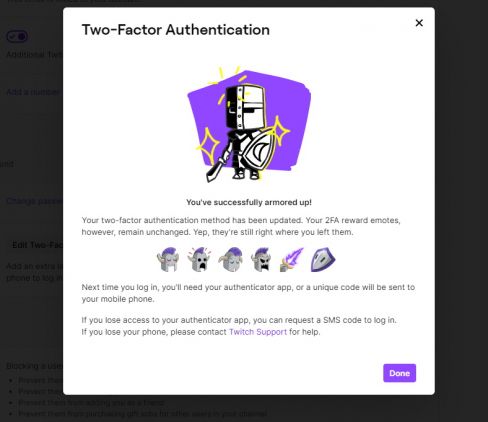
- Once this is completed, you’ll be a hero. Well, a hero for your own account! You’ll also get some cool 2FA reward emotes for protecting your account.
Give yourself a hand! You just enabled Two-Factor Authentication (2FA).
Change your Twitch Stream Key.
Once you changed your password, you sort of broke your Stream Key. So now you’ll need to set up a new one. The Stream Key is important as this is what you’ll enter into whatever program you’ll use to stream with.
- Head over Twitch and sign-in.
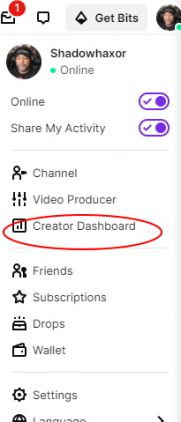
- In the upper-right hand corner, click “Creator Dashboard”.
- In the Creator’s Dashboard, click th “Settings” icon with the gear, it’d on the left-hand side.
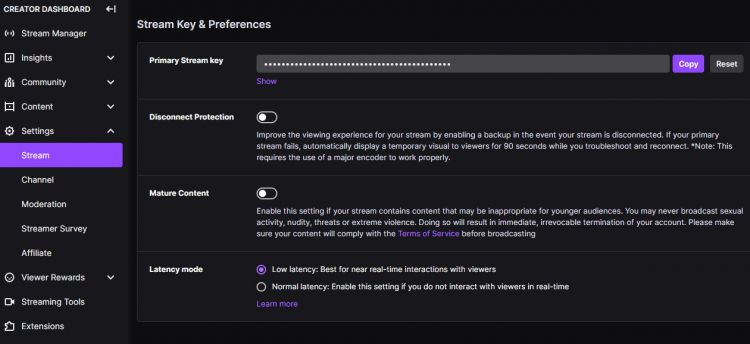
- Now click on “Stream”. Here you’ll see the “Private Stream Key”. You can reset it by clicking on “Reset” and copy it as well. If anyone ever sees your key, you can reset it here.
If you have followed all of these steps, then you have successfully protected your Twitch account. The rest is up to Twitch.


